Upload your FileMaker.fmp12 (FMP 12, 13 & 14 compatible) Database file.
FileMaker 13 or 14 Pro or Advanced are required.
SECTION 1 - Add your Hosting Server to your Favorites in FileMaker Pro:
Steps:
1. Open FileMaker Pro (Advanced or Pro).
2. a) Select Open Remote as shown below in Figure 1.
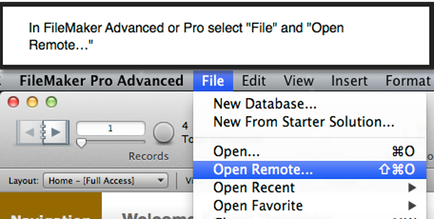
Figure 1.
2. b) The Open Remote File window will now be open, select Favorite Hosts if it is not alread selected. Click on the Add button in the bottom left of the window as shown below in Figure 2.
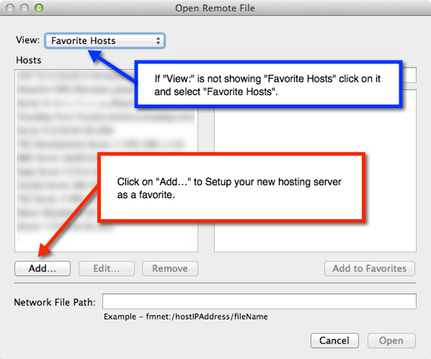
Figure 2
2. c) Define the Favorite server as shown below in Figure 3.
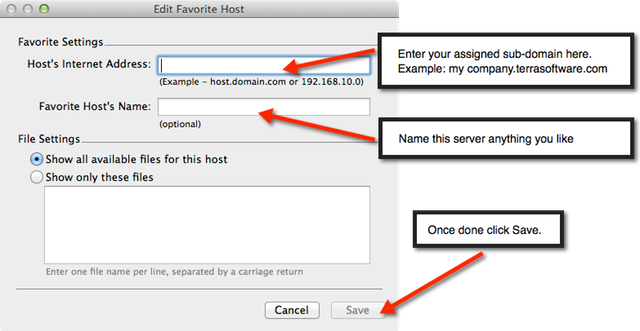
Figure 3
Important...
Now that you have your Favorite Host added it will show up on the left side Pane of the Open Remote File Window under Hosts as seen in Figure 2. Click on the Favorite host to be prompted for the login to the server. The login to use, is your user name and password for your FileMaker file.
SECTION 2 - Uploading your database to the FileMaker Server:
Steps:
1. Open FileMaker Pro (If you do not have FileMaker Pro you can purchase a full copy or Upgrade at FileMaker.com). You need to have a FileMaker Window open to select the following.
2. a) Select the Share Button and select "Upload to FileMaker Server…" as shown in Figure 4.

Figure 4
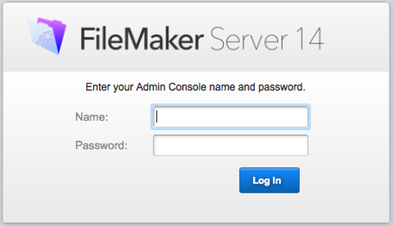
2. b) Enter your assigned Admin user name and password as shown in Figure 5.
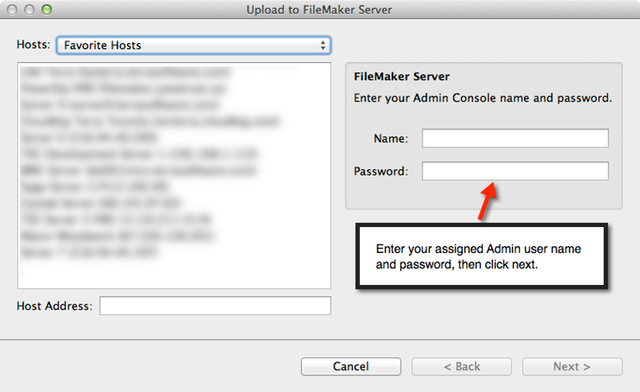
Figure 5
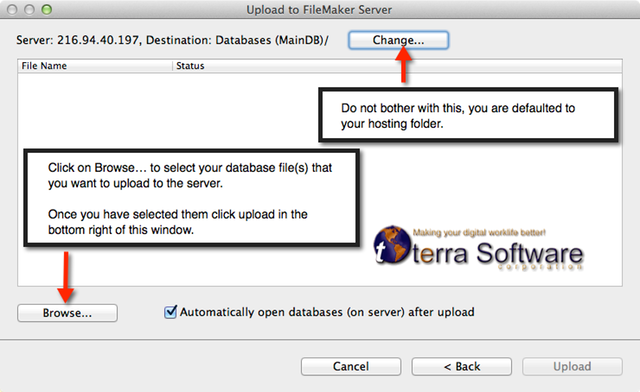
2. c) Select your database(s) and click Next as shown in Figure 6.
3. Now you can connect to your FileMaker Database at the Data Centre. You can use Open Remote to connect as described in Section 1 Steps 1 - 2 but now your server is listed in your favorites, click on that and you will be prompted for your user name and password that exists on your database file. It will then appear or a list of your files will appear on the right side of the window, click on one of them to proceed. Due to the SSL being turned on you will be prompted to login again but to the specific file you selected, so please re-enter your user name and password.
SECTION 3 - Login to your FileMaker Admin Console:
Steps:
1. Using your web browser use the following link but replace the "xxxx" part of the web address with your server ID.
https://xxxx.terrasoftware.com:16000/admin-console/
Example: https://server1.terrasoftware.com:16000/admin-console/
2. Enter the User Name and Password you were sent in the email with the subject "FileMaker Hosting Credentials".
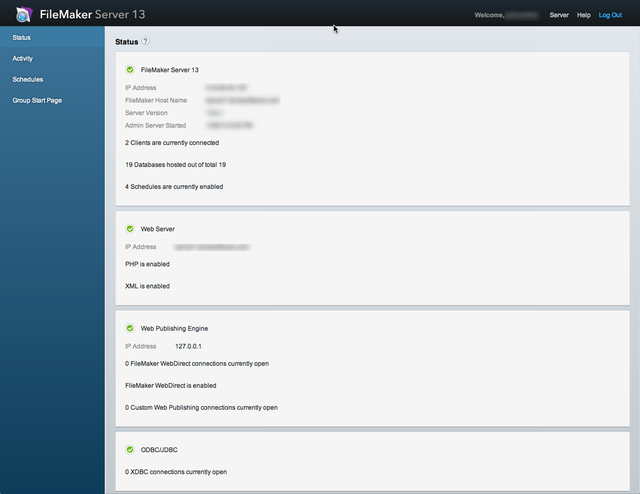
Once logged in you will see this main dashboard as listed below. From here you can check up on your files, who is connected, Schedules for scripts and backups. PLEASE DO NOT REMOVE OR MODIFY THE 15 Min and Daily Backups.
Terra Software Corporation is an independent entity and this web site has not been authorized, sponsored, or otherwise affiliated with FileMaker, Inc. FileMaker is a trademark of FileMaker, Inc., registered in the U.S. and other countries. We support FileMaker Inc’s market share growth through the use and advancement of the FileMaker Product line.